- Products
- Air Compressors & Air Tools
- Climate Control
- Compaction Equipment
- Concrete Cutting Tools & Equipment
- Concrete and Masonry
- Demolition & Excavation
- Electrical & Mechanical
- Fasteners and Anchoring Adhesives
- Floor Protection
- Generators and Welders
- Hand Tools
- Heaters
- Janitorial and Office Supplies
- Jobsite Protection
- Ladders & Storage
- Lighting & Lighting Accessories
- Man Lifts
- Material Handling Equipment
- Power Tools
- Pressure Washers & Pumps
- Safety Gear
- Safety Products
- Saws
- Surface Preparation
- SEASONAL PRODUCTS
- Rentals
- Air Compressor and Air Tool Rentals
- Climate Control Rental
- Compaction Rentals
- Concrete Equipment Rentals
- Demolition & Excavation Equipment Rentals
- Concrete Floor Grinder Rentals
- General Construction Equipment Rentals
- Generator Rentals and Welder Rentals
- Heater Rentals
- Light Tower Rentals
- Man Lift Rentals in Massachusetts and Rhode Island
- Material Handling Equipment Rentals
- Pressure Washer & Pump Rentals
- Saw Rentals in New England
- SEASONAL PRODUCTS
- Products
- Air Compressors & Air Tools
- Climate Control
- Compaction Equipment
- Concrete Cutting Tools & Equipment
- Demolition & Excavation
- Electrical & Mechanical
- Floor Protection
- Generators and Welders
- Construction Heaters
- Construction Ladders, Staging, & Storage
- Construction Lighting
- Man Lifts
- Material Handling Equipment
- Industrial Janitorial and Office Supplies
- Pressure Washers & Pumps
- Construction Safety Products
- Construction Safety Gear
- Surface Preparation
- Building Protection
- Diesel Accessories
- Zero Emissions
- Rentals
- Air Compressor and Air Tool Rentals
- Climate Control Rental
- Compaction Rentals
- Concrete Equipment Rental
- Demolition & Excavation Equipment Rental
- General Construction Equipment Rental
- Generator Rentals and Welder Rentals
- Construction Heaters Rental
- Light Tower Rentals
- Man Lift Rentals
- Material Handling Equipment Rental
- Pressure Washer & Pump Rentals
- Saw Rentals in New England
- Concrete Floor Grinder Rentals
- Zero Emissions Rentals
- Repairs & Used
- Parts
- Blog
- Services
- Resources
- About Us
- Contact Us
Sales & Rental of Construction | Industrial Equipment & Supplies


What Are the Best Concrete Finishing Tools?
Choosing the best concrete finishing tools is less about owning everything and more about matching each tool to the concrete’s condition.
Bob Harris, a respected decorative concrete educator, offers a practical warning: “You can’t fix concrete after it has hardened.” His point remains important on busy job sites. Timing matters as much as tool quality. A bull float can close shallow ridges after screeding, while a magnesium float helps bring paste to the surface without excessive pressure. Later, a steel trowel can create a dense, smooth finish, but using it too early may trap bleed water beneath the surface. That mistake can lead to blistering or scaling.
This guide examines concrete finishing tools through real working conditions. It considers slab size, mix design, weather, surface texture, and crew experience. The right tool should feel balanced, leave consistent marks, and survive repeated use. A worn fresno may produce uneven pressure. A poorly adjusted power trowel can burn the surface. Small details matter.
Some recommendations will be clear. Others deserve caution. Not every premium tool improves the final slab. Sometimes, better timing creates better results. That is easy to forget.
Expect practical comparisons of screeds, floats, trowels, edgers, groovers, brooms, and power equipment. The discussion also addresses cleaning, storage, and safe handling. These steps seem ordinary, yet neglected maintenance shortens tool life and weakens consistency. The best choice is rarely universal. It depends on what the concrete is doing beneath the finisher’s hands.

Table of Contents
[Hide]
Classify Tools by ACI 302.1R: Strikeoff, Float, Trowel, and Cure
What Are the Best Concrete Finishing Tools?
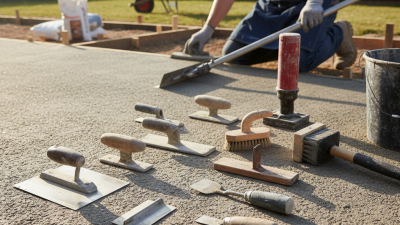
The best tools depend on the finishing stage, not personal preference. ACI 302.1R classifies the workflow into strikeoff, float, trowel, and cure. A strikeoff removes excess concrete and establishes the planned elevation. Screeds, straightedges, and vibrating tools support this stage. Floating follows, closing shallow marks while keeping coarse aggregate properly embedded. Bull floats and hand floats are common choices.
Troweling begins after bleed water disappears. ACI 302.1R warns that premature troweling can trap water and weaken the surface. Power trowels suit large slabs, while hand trowels provide control near edges and penetrations. Curing is not optional. ACI 308R identifies moisture retention as essential for strength and durability. The Global Cement and Concrete Association reports that the world uses about 14 billion cubic metres of concrete each year. That scale makes disciplined finishing more important, even on smaller projects. I still see crews choosing tools by habit. That assumption sometimes fails.
Tips: Check slab stiffness before floating. Keep tools clean and flat. Do not add water for easier finishing. Record air temperature, concrete temperature, slump, and finishing times. These details support reliable decisions later. For curing, apply the selected method consistently across the entire surface. Small uncovered edges can dry first. A brief site trial can reveal problems before the main placement begins.
Related Posts
-
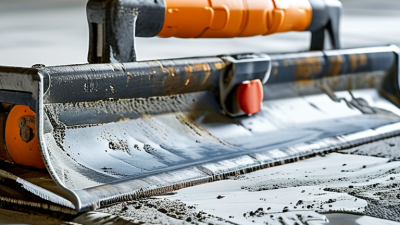
How to Choose the Best Concrete Finishing Tools
-
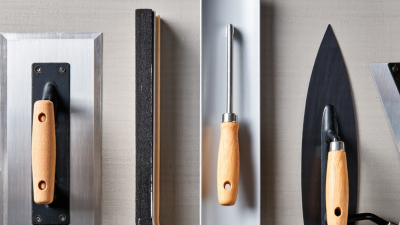
7 Best Concrete Hand Tools for Global Buyers?
-
10 Tips for Choosing Concrete Tools for Global Buyers
-
Exploring the Evolution of Shop Tools from Handheld Gadgets to Smart Technology
-
Top 10 Concrete Hand Tools Every DIYer Should Have and Tips for Using Them
-

Top Professional Tools in China for Global Buyers?

© Copyright - Pro Tool & Supply - Site by SVM E-Marketing Solutions - Sitemap
- Privacy policy