Sales & Rental of Construction | Industrial Equipment & Supplies

How to Choose the Best Concrete Finishing Tools

Concrete is the world’s most widely used construction material, with approximately 14 billion cubic metres produced annually, according to the Global Cement and Concrete Association’s industry roadmap. That scale makes tool selection more than a purchasing decision. It affects slab quality, labor efficiency, surface durability, and project waste. The right concrete finishing tools can prevent ridges, uneven texture, and premature surface damage. A poorly chosen float can create problems before the first curing compound is applied.

Professional selection begins with the slab, not the catalogue. ACI 302.1R, Guide for Concrete Floor and Slab Construction, emphasizes timing, surface preparation, finishing methods, and curing conditions. These factors guide whether a crew needs a magnesium float, power trowel, bull float, fresno, edger, or broom. For example, a large warehouse floor may require a ride-on power trowel, while a narrow residential path needs lightweight hand tools. Check concrete slump, aggregate size, finishing window, and weather exposure. Tool material matters too. Magnesium often feels smoother on fresh concrete, while steel can produce a tighter finish at the correct stage.

The margin is small. Too early, and bleed water becomes trapped. Too late, and the surface may resist finishing. OSHA’s respirable crystalline silica requirements also make dust control and safer work practices essential when cutting or grinding cured concrete. Experience still matters, but experience can be inconsistent. A useful checklist, product specifications, and manufacturer guidance reduce guesswork. This guide examines practical tool choices, common mistakes, and the details that separate a clean finish from an expensive repair. Some recommendations will not fit every crew, and that limitation deserves honest attention.
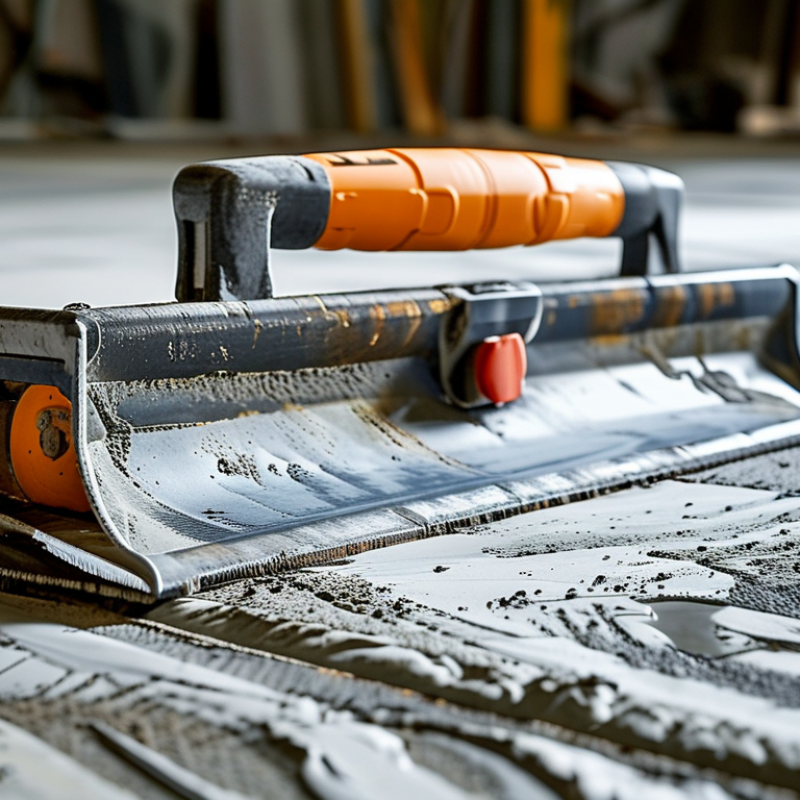
How to Choose the Best Concrete Finishing Tools

Understanding Concrete Finishing Tools and Their Functions

Choosing concrete finishing tools starts with understanding their functions, not their appearance. A screed levels fresh concrete across forms, while a darby removes small ridges and fills shallow depressions. A bull float pushes aggregate down and brings paste upward. Timing matters. A tool used too early can trap bleed water beneath the surface.

ACI 302.1R-15 advises contractors to begin final finishing only after bleed water disappears. A power trowel then densifies the slab and creates a smoother surface. Edgers shape slab corners, and groovers form control joints at planned depths. A broom creates texture for better traction. In my experience, inexperienced crews often choose a power trowel too soon. That mistake may produce blisters, dusting, or weak surface paste. The tool was not the real problem. The timing was.

Tips: Match each tool to the concrete’s condition. Keep blades clean and properly adjusted. Check the slab with a straightedge before polishing. OSHA’s respirable crystalline silica standard sets a 50 micrograms-per-cubic-meter permissible exposure limit, with a 25 micrograms action level over eight hours. Wet-cutting, local exhaust, and suitable housekeeping reduce dust during grooving or surface correction. A 2023 National Safety Council workplace report also reinforces the value of planned hazard controls, although daily site conditions still require judgment. A written checklist helps. It cannot replace experience.

Assessing Project Requirements Before Choosing Tools

Before choosing concrete finishing tools, define the project’s real demands. Measure slab size, mix design, placement rate, access, surface tolerance, and crew experience. ACI 302.1R warns that finishing while bleed water remains can cause blisters and delamination. Timing matters more than tool quantity.

The U.S. Bureau of Labor Statistics projects 7% employment growth for construction and extraction occupations from 2023 to 2033. This may increase pressure on smaller crews and faster workflows. However, faster is not always better. A wide power trowel may suit an open warehouse, but it can damage edges in a narrow room. Hand tools may provide better control around columns, drains, and joints.

Tips: Check the slump, weather, and expected finishing window before mobilization. Match blade size to access and surface hardness. Keep an edging tool nearby. Test one small area first. Record what failed; the crew’s first choice may still need revision. OSHA’s construction safety statistics continue to identify falls as a major hazard, so choose tools that reduce awkward reaching and unstable movement. ACI 308R also emphasizes curing conditions, meaning finishing decisions should support the curing plan, not work against it.

How to Choose the Best Concrete Finishing Tools

Assessing Project Requirements Before Choosing Tools

Concrete slump is a practical requirement to assess before selecting finishing tools. Lower-slump concrete generally requires more controlled mechanical finishing, while higher-slump concrete may require faster timing and lighter surface manipulation.

The ranges shown follow the slump classes defined in EN 206: S1 = 10–40 mm, S2 = 50–90 mm, S3 = 100–150 mm, S4 = 160–210 mm, and S5 = at least 220 mm. Use project specifications, weather conditions, concrete mix design, and surface-finish requirements before final tool selection.

Comparing Manual, Power, and Specialized Finishing Tools

Choosing concrete finishing tools depends on slab size, surface condition, timing, and the finish you need.

Manual tools offer direct control. A magnesium float can close small ridges and expose finer material near edges. Edgers and groovers create clean borders and joints. They work well for steps, patios, and repairs where accuracy matters more than speed.

Power tools become practical on larger slabs. A walk-behind power trowel can cover broad areas quickly, but it demands careful timing and steady movement. Using it while bleed water remains on the surface may weaken the concrete paste.

Timing matters. I once started too early and trapped water beneath the finished layer. The surface looked smooth, but later showed soft patches. That mistake taught me to check firmness across several areas, not just one corner.

Specialized tools solve specific finishing problems. A fresno can refine a wide slab after floating, while a broom creates texture for better foot traction. A laser screed may improve level control on large commercial pours, though it requires trained operators and suitable access.

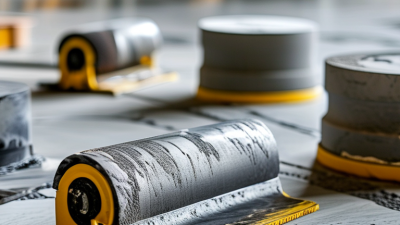
For decorative work, stamps, texture rollers, and edging tools need consistent pressure. Use light pressure. Excessive force can distort the surface or pull cement-rich paste upward. Experienced finishers also keep spare blades, clean tools, and protective equipment nearby because changing conditions can make the planned method unsuitable.

Selecting Tools for Different Concrete Finishing Stages

Concrete finishing tools should match each stage, not personal habit. The USGS Mineral Commodity Summaries 2025 reports about 4.1 billion metric tons of cement production worldwide in 2024. That scale makes consistent finishing practice essential.

During placement, use a straightedge or laser screed to correct level and slope. Avoid using a bull float aggressively when bleed water remains. ACI 302.1R-15 identifies finishing timing as a major factor in slab quality. I have seen surfaces weaken when crews chase a perfect appearance too early. Patience matters here.

After bleed water disappears, choose a magnesium or aluminum float for closing ridges and refining texture. Use an edging tool around forms and joints. For large floors, a power trowel improves productivity, but only after the concrete supports the operator’s weight. The 2023 Global Cement and Concrete Association roadmap notes that cement-related emissions remain a significant climate concern, commonly estimated near 7% of global emissions. Longer-lasting slabs reduce avoidable repairs. Timing still beats speed.

For final texture, select a broom suited to the required slip resistance. A stiff broom creates deeper grooves; a soft broom leaves a finer profile. Check the surface under changing light. Small defects can disappear when wet. That is where judgment, and sometimes a second inspection, becomes necessary.

How to Choose the Best Concrete Finishing Tools - Selecting Tools for Different Concrete Finishing Stages

Finishing Stage Primary Tool Suitable Tool Specification Main Function Typical Readiness Indicator Recommended Technique Quality Check Key Precaution
Initial Striking-Off Straightedge screed or vibrating screed Rigid straightedge approximately 1.8–3.0 m long; vibrating models should match the pour width and concrete consistency. Removes excess concrete and establishes the basic elevation and flatness. Concrete is freshly placed and workable, with enough material above the intended level for striking off. Move the screed with a controlled sawing motion while advancing gradually; avoid excessive vibration. Check elevation with a level or laser and verify that no low spots remain. Do not add water to improve workability; excess water can increase shrinkage and reduce surface strength.
Early Consolidation Bull float or darby Bull float about 1.2–2.4 m wide for large slabs; magnesium or aluminum blades are commonly used. Flattens ridges, closes small surface gaps, and slightly embeds larger aggregate. Immediately after screeding, while the surface is still plastic but not covered with excessive bleed water. Push and pull with the blade kept nearly flat; lift the handle slightly on the return stroke. Look for a uniform surface without deep grooves, ridges, or exposed coarse aggregate. Do not overwork the surface or use a bull float after bleed water has accumulated.
Surface Refinement Hand float Magnesium, aluminum, or wood float approximately 300–500 mm long, selected according to the required texture. Corrects minor imperfections and brings a small amount of cement paste to the surface. The surface has lost its wet sheen and can support light finishing without significant displacement. Use long, overlapping strokes with light pressure; keep the blade or float clean. Confirm consistent texture and verify that the float has not pulled coarse aggregate to the surface. Avoid floating bleed water into the slab, as this may create a weak, dusty surface layer.
Edge Formation Concrete edger Edger with a rounded lip commonly producing a 6–19 mm radius, selected to match the project detail. Forms a neat, slightly rounded slab edge and reduces edge chipping. Concrete is firm enough to hold the edge but soft enough for the tool to form a continuous groove. Make smooth, continuous passes with the tool fully supported on the formwork. Check that the radius is continuous and that the edge remains aligned with the form. Do not force the edger through concrete that is too stiff; this can tear the edge.
Control-Joint Grooving Groover or jointing tool Groover sized to the specified joint width; joint depth should generally be at least one-quarter of the slab thickness. Creates planned weakened planes to help control random shrinkage cracking. Concrete is firm enough to retain the groove without closing, but still workable for cutting. Use a straight guide or marked layout and make one controlled pass where possible. Measure joint alignment, width, and depth; confirm the layout follows the project drawings. Coordinate joint timing carefully; late or shallow joints may not effectively control cracking.
Machine Troweling Power trowel Choose walk-behind or ride-on equipment according to slab size; use pans for early passes and finishing blades later. Produces a dense, smooth surface for industrial floors and other hard-troweled finishes. Bleed water has disappeared and the slab supports the machine without excessive rutting; a shallow footprint may remain. Begin with low blade pitch and increase gradually; overlap passes and avoid stopping in one location. Inspect for uniform sheen, flatness, burn marks, ridges, and surface tearing. Never power-trowel standing bleed water or apply dry cement to absorb moisture.
Slip-Resistant Texturing Broom or texture brush Stiff-bristle broom with width appropriate to the placement area; use finer bristles for lighter texture. Creates directional grooves that improve surface traction, especially on exterior slabs. Concrete is firm enough to retain texture but soft enough for bristles to form clear, shallow grooves. Pull the broom in one consistent direction with steady pressure and overlapping passes. Check groove depth, direction, spacing, and visual consistency across the slab. Avoid brooming too early, which can create ridges and displace paste, or too late, which can tear the surface.
Detail Finishing Margin trowel and pointing trowel Narrow steel blade approximately 75–150 mm wide for corners, penetrations, edges, and restricted areas. Refines locations that larger floats, screeds, or power equipment cannot reach. Concrete has sufficient body to retain a sharp detail without excessive sticking to the blade. Use short, controlled strokes and blend repaired areas into the surrounding finish. Check corners, penetrations, form edges, and transitions for voids or abrupt texture changes. Keep tools clean and avoid repeatedly disturbing the same area.
Curing and Protection Sprayer, curing cover, or curing compound applicator Low-pressure sprayer for curing compound or clean, damp curing covers that remain in continuous contact with the surface. Limits early moisture loss and temperature-related drying to support strength development and reduce cracking risk. Begin as soon as finishing is complete and the surface will not be marred by the selected curing method. Apply uniformly according to the product instructions or keep covers continuously damp without ponding water. Verify complete coverage, uninterrupted curing, and protection from early traffic or freezing conditions. Do not allow curing materials to stain the surface or use incompatible curing compounds before later coatings.

Note: Finishing time varies with concrete mix, temperature, wind, humidity, slab thickness, and site conditions. Always follow the project specifications and confirm surface readiness before changing tools or finishing methods.

Checking Tool Quality, Comfort, Maintenance, and Safety

Choosing concrete finishing tools requires more than checking a sharp edge or low price. In practice, tool quality appears during long passes across wet concrete. A reliable blade leaves an even surface without sudden drag. Inspect the handle, fasteners, and working edge before each pour. Look for straight alignment, solid joints, and materials that resist bending. Small defects matter. A loose connection can create ridges and force awkward wrist movements. I once underestimated handle length, and extra reaching caused shoulder fatigue before the slab was finished. That mistake changed how I compare tools. Weight should match the task, not simply feel heavy and impressive. Test the grip with gloves, since wet hands make smooth handles risky. Comfort is a safety feature, not a luxury.

Maintenance also affects finishing quality. Rinse concrete residue away before it hardens, then dry metal surfaces completely. Dried paste can distort the next stroke and hide cracks around fasteners. Store tools off the ground in a dry, organized space. Before use, check for bent shafts, chipped edges, and damaged grips. Replace questionable parts rather than relying on temporary fixes. Wear suitable gloves, eye protection, sturdy footwear, and clothing that supports safe movement. Keep bystanders away from fresh slabs and moving handles. Follow site procedures and the manufacturer’s instructions when available. I still review my setup after each job, because experience can create overconfidence. A familiar tool can fail. Careful checks remain necessary.

© Copyright - Pro Tool & Supply - Site by SVM E-Marketing Solutions - Sitemap - Privacy policy