- Products
- Air Compressors & Air Tools
- Climate Control
- Compaction Equipment
- Concrete Cutting Tools & Equipment
- Concrete and Masonry
- Demolition & Excavation
- Electrical & Mechanical
- Fasteners and Anchoring Adhesives
- Floor Protection
- Generators and Welders
- Hand Tools
- Heaters
- Janitorial and Office Supplies
- Jobsite Protection
- Ladders & Storage
- Lighting & Lighting Accessories
- Man Lifts
- Material Handling Equipment
- Power Tools
- Pressure Washers & Pumps
- Safety Gear
- Safety Products
- Saws
- Surface Preparation
- SEASONAL PRODUCTS
- Rentals
- Air Compressor and Air Tool Rentals
- Climate Control Rental
- Compaction Rentals
- Concrete Equipment Rentals
- Demolition & Excavation Equipment Rentals
- Concrete Floor Grinder Rentals
- General Construction Equipment Rentals
- Generator Rentals and Welder Rentals
- Heater Rentals
- Light Tower Rentals
- Man Lift Rentals in Massachusetts and Rhode Island
- Material Handling Equipment Rentals
- Pressure Washer & Pump Rentals
- Saw Rentals in New England
- SEASONAL PRODUCTS
- Products
- Air Compressors & Air Tools
- Climate Control
- Compaction Equipment
- Concrete Cutting Tools & Equipment
- Demolition & Excavation
- Electrical & Mechanical
- Floor Protection
- Generators and Welders
- Construction Heaters
- Construction Ladders, Staging, & Storage
- Construction Lighting
- Man Lifts
- Material Handling Equipment
- Industrial Janitorial and Office Supplies
- Pressure Washers & Pumps
- Construction Safety Products
- Construction Safety Gear
- Surface Preparation
- Building Protection
- Diesel Accessories
- Zero Emissions
- Rentals
- Air Compressor and Air Tool Rentals
- Climate Control Rental
- Compaction Rentals
- Concrete Equipment Rental
- Demolition & Excavation Equipment Rental
- General Construction Equipment Rental
- Generator Rentals and Welder Rentals
- Construction Heaters Rental
- Light Tower Rentals
- Man Lift Rentals
- Material Handling Equipment Rental
- Pressure Washer & Pump Rentals
- Saw Rentals in New England
- Concrete Floor Grinder Rentals
- Zero Emissions Rentals
- Repairs & Used
- Parts
- Blog
- Services
- Resources
- About Us
- Contact Us
Sales & Rental of Construction | Industrial Equipment & Supplies


Top 10 Door Cabinet Hinges for Global Buyers?
Selecting the right Door Cabinet Hinges is a practical engineering decision, not merely a hardware preference. A hinge controls alignment, opening force, door clearance, noise, and long-term cabinet performance. Global buyers also face different materials, installation methods, kitchen designs, and service expectations. Small components matter.
Market evidence supports this attention to detail. Grand View Research reports continued growth in the global furniture market, driven by residential construction, renovation, and demand for functional storage. The Freedonia Group has also identified cabinet hardware replacement and remodeling as important demand areas in mature markets. Meanwhile, the 2024 Houzz U.S. Kitchen Trends Study shows that homeowners continue investing in kitchen upgrades, including cabinet improvements. These reports do not measure every hinge shipment directly, but they reveal a broader purchasing environment.
This guide reviews ten Door Cabinet Hinges for international buyers. It considers overlay dimensions, cup diameter, opening angle, load capacity, corrosion resistance, soft-close behavior, and adjustment range. Manufacturing experience suggests that a smooth sample does not guarantee stable production. Batch consistency matters more. A hinge may feel excellent in a showroom, then loosen after repeated use. That risk deserves attention.
Buyers should also verify mounting plates, screw compatibility, packaging protection, testing records, and supplier communication. EN 15570 and related furniture-hardware testing practices can provide useful reference points, although requirements vary by application and market. No single hinge fits every cabinet. The best choice balances performance, price, availability, and after-sales support. It may not be the cheapest option. That is often the uncomfortable truth.
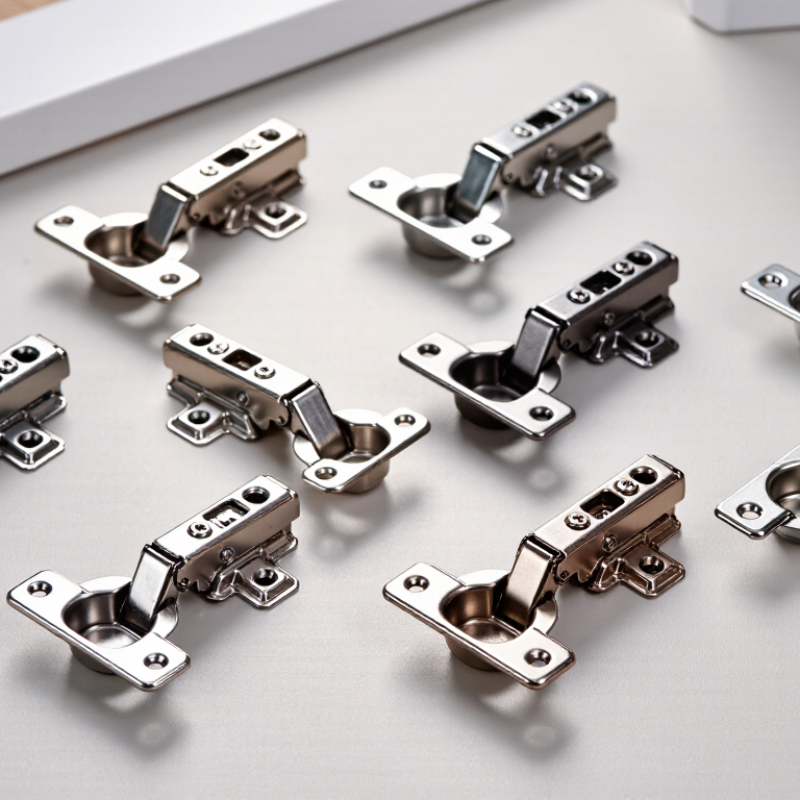
Table of Contents [Hide]
Types of Door Cabinet Hinges and Their Core Functions
Top 10 Door Cabinet Hinges for Global Buyers
Types of Door Cabinet Hinges and Their Core Functions
Cabinet hinges control movement, alignment, closing force, and long-term door stability. Mordor Intelligence’s 2024 cabinet hardware analysis estimates steady market growth through 2029, driven by renovation and modular furniture demand. That growth makes hinge selection more technical than it appears. Concealed hinges hide inside the cabinet. Overlay hinges suit doors covering the frame. Inset hinges keep doors flush with the cabinet face. Half-overlay hinges serve shared partitions. Face-frame hinges attach directly to front frames, while frameless hinges mount inside full cabinet boxes. Soft-close hinges reduce impact and noise. Self-closing hinges pull doors shut. Pivot hinges support wide or heavy doors. Glass-door hinges use clamps or specialized cups without drilling the glass.
Each type solves a different installation problem. A concealed hinge may offer three-way adjustment for height, depth, and side alignment. That small correction matters when cabinet gaps look uneven under bright kitchen lighting. Soft-close models usually depend on an integrated damper, but damping strength can vary with door weight and temperature. That is often overlooked. The National Kitchen & Bath Association’s kitchen design research continues to identify storage access and smooth operation as important user expectations. Buyers should check cup diameter, opening angle, overlay distance, load rating, corrosion resistance, and screw-hole accuracy. ISO 9227 salt-spray testing can help compare corrosion performance, although laboratory results do not perfectly reproduce humid homes. Mistakes happen. A hinge that fits the door may still fail the cabinet body.

© Copyright - Pro Tool & Supply - Site by SVM E-Marketing Solutions - Sitemap
- Privacy policy