- Products
- Air Compressors & Air Tools
- Climate Control
- Compaction Equipment
- Concrete Cutting Tools & Equipment
- Concrete and Masonry
- Demolition & Excavation
- Electrical & Mechanical
- Fasteners and Anchoring Adhesives
- Floor Protection
- Generators and Welders
- Hand Tools
- Heaters
- Janitorial and Office Supplies
- Jobsite Protection
- Ladders & Storage
- Lighting & Lighting Accessories
- Man Lifts
- Material Handling Equipment
- Power Tools
- Pressure Washers & Pumps
- Safety Gear
- Safety Products
- Saws
- Surface Preparation
- SEASONAL PRODUCTS
- Rentals
- Air Compressor and Air Tool Rentals
- Climate Control Rental
- Compaction Rentals
- Concrete Equipment Rentals
- Demolition & Excavation Equipment Rentals
- Concrete Floor Grinder Rentals
- General Construction Equipment Rentals
- Generator Rentals and Welder Rentals
- Heater Rentals
- Light Tower Rentals
- Man Lift Rentals in Massachusetts and Rhode Island
- Material Handling Equipment Rentals
- Pressure Washer & Pump Rentals
- Saw Rentals in New England
- SEASONAL PRODUCTS
- Products
- Air Compressors & Air Tools
- Climate Control
- Compaction Equipment
- Concrete Cutting Tools & Equipment
- Demolition & Excavation
- Electrical & Mechanical
- Floor Protection
- Generators and Welders
- Construction Heaters
- Construction Ladders, Staging, & Storage
- Construction Lighting
- Man Lifts
- Material Handling Equipment
- Industrial Janitorial and Office Supplies
- Pressure Washers & Pumps
- Construction Safety Products
- Construction Safety Gear
- Surface Preparation
- Building Protection
- Diesel Accessories
- Zero Emissions
- Rentals
- Air Compressor and Air Tool Rentals
- Climate Control Rental
- Compaction Rentals
- Concrete Equipment Rental
- Demolition & Excavation Equipment Rental
- General Construction Equipment Rental
- Generator Rentals and Welder Rentals
- Construction Heaters Rental
- Light Tower Rentals
- Man Lift Rentals
- Material Handling Equipment Rental
- Pressure Washer & Pump Rentals
- Saw Rentals in New England
- Concrete Floor Grinder Rentals
- Zero Emissions Rentals
- Repairs & Used
- Parts
- Blog
- Services
- Resources
- About Us
- Contact Us
Sales & Rental of Construction | Industrial Equipment & Supplies


What Is an Electrical Plug Lockout and How Does It Work?
Electrical Plug Lockout devices help prevent equipment from being energized during maintenance, cleaning, or repair. A typical unit fits over an unplugged electrical plug and closes around its body. A worker then secures it with a personal padlock, making the plug difficult to reconnect to an outlet. The locked cover is visible. That matters when several people share a work area or a machine is being serviced away from its usual station.
Designs vary. Some accommodate common plug shapes, while others fit only specific sizes or cord arrangements. Before use, workers should check that the device fits the plug, cannot be removed without the lock, and does not leave the plug accessible. Clear identification can also help coworkers understand why the equipment must remain disconnected. Small details count, such as a loose cover or a cord that can still be pulled through an opening.
An Electrical Plug Lockout is one part of a broader energy-control process, not a substitute for careful preparation. Qualified workers should follow the equipment manufacturer’s instructions and their workplace procedures. They should also confirm that the machine cannot start before beginning work; unplugging alone may not address stored energy or other power sources. There is no single device for every plug. Choosing the wrong fit can create false confidence, and that is worth checking twice. This guide explains how plug lockouts work, what features to inspect, and where their limits matter.
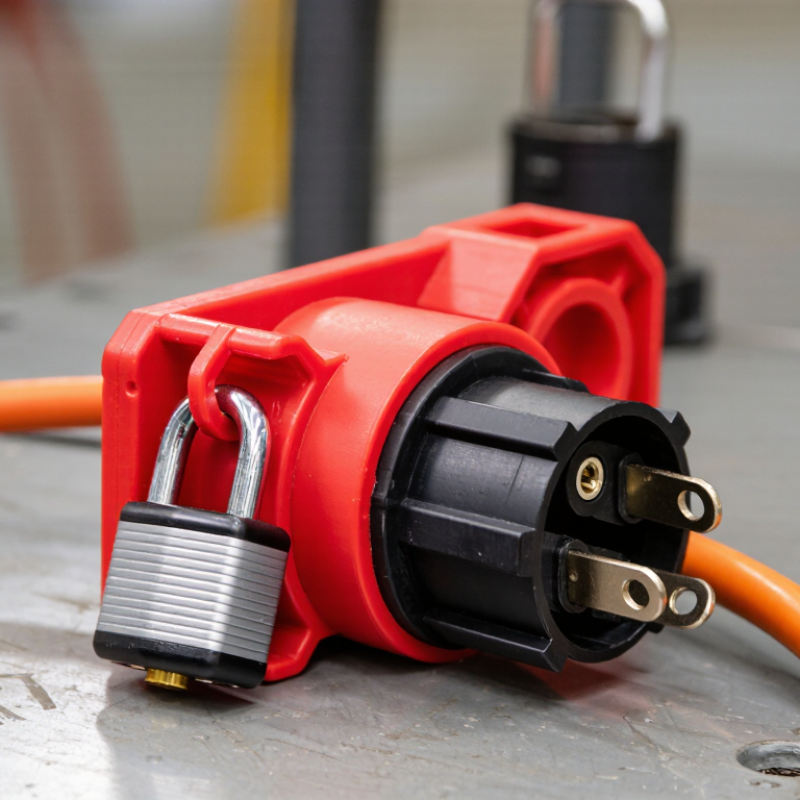
Table of Contents [Hide]
What Is an Electrical Plug Lockout?
An electrical plug lockout is a physical device that secures an unplugged cord end so it cannot be reconnected to a power outlet. The enclosure fits around the plug, then accepts a padlock or other locking mechanism. With the plug trapped inside, workers can see that the equipment should remain disconnected during servicing or cleaning. It is a straightforward barrier. But it only works when the device fits the plug and is properly secured.
Plug lockouts are one part of lockout/tagout, not proof that equipment is safe to touch. A qualified worker should isolate the energy source, unplug the equipment, apply the lockout, and verify that power is off before work begins. OSHA’s lockout/tagout guidance estimates that effective energy-control procedures protect nearly three million workers and prevent about 120 fatalities and 50,000 injuries each year. The figures cover hazardous-energy control broadly, not plug lockouts alone. That distinction matters. A bulky plug, damaged cord, or nearby second power source can complicate the task. Check the fit, identify every energy source, and follow the site’s procedure; small oversights can leave equipment energized.

© Copyright - Pro Tool & Supply - Site by SVM E-Marketing Solutions - Sitemap
- Privacy policy