- Products
- Air Compressors & Air Tools
- Climate Control
- Compaction Equipment
- Concrete Cutting Tools & Equipment
- Concrete and Masonry
- Demolition & Excavation
- Electrical & Mechanical
- Fasteners and Anchoring Adhesives
- Floor Protection
- Generators and Welders
- Hand Tools
- Heaters
- Janitorial and Office Supplies
- Jobsite Protection
- Ladders & Storage
- Lighting & Lighting Accessories
- Man Lifts
- Material Handling Equipment
- Power Tools
- Pressure Washers & Pumps
- Safety Gear
- Safety Products
- Saws
- Surface Preparation
- SEASONAL PRODUCTS
- Rentals
- Air Compressor and Air Tool Rentals
- Climate Control Rental
- Compaction Rentals
- Concrete Equipment Rentals
- Demolition & Excavation Equipment Rentals
- Concrete Floor Grinder Rentals
- General Construction Equipment Rentals
- Generator Rentals and Welder Rentals
- Heater Rentals
- Light Tower Rentals
- Man Lift Rentals in Massachusetts and Rhode Island
- Material Handling Equipment Rentals
- Pressure Washer & Pump Rentals
- Saw Rentals in New England
- SEASONAL PRODUCTS
- Products
- Air Compressors & Air Tools
- Climate Control
- Compaction Equipment
- Concrete Cutting Tools & Equipment
- Demolition & Excavation
- Electrical & Mechanical
- Floor Protection
- Generators and Welders
- Construction Heaters
- Construction Ladders, Staging, & Storage
- Construction Lighting
- Man Lifts
- Material Handling Equipment
- Industrial Janitorial and Office Supplies
- Pressure Washers & Pumps
- Construction Safety Products
- Construction Safety Gear
- Surface Preparation
- Building Protection
- Diesel Accessories
- Zero Emissions
- Rentals
- Air Compressor and Air Tool Rentals
- Climate Control Rental
- Compaction Rentals
- Concrete Equipment Rental
- Demolition & Excavation Equipment Rental
- General Construction Equipment Rental
- Generator Rentals and Welder Rentals
- Construction Heaters Rental
- Light Tower Rentals
- Man Lift Rentals
- Material Handling Equipment Rental
- Pressure Washer & Pump Rentals
- Saw Rentals in New England
- Concrete Floor Grinder Rentals
- Zero Emissions Rentals
- Repairs & Used
- Parts
- Blog
- Services
- Resources
- About Us
- Contact Us
Sales & Rental of Construction | Industrial Equipment & Supplies


What Is the Best Hole Saw for Metal?
Choosing the best Hole Saw For Metal starts with one simple fact: metal is not a single cutting material. Thin aluminum behaves differently from thick steel, and stainless steel can quickly expose a weak cutter. The right choice depends on the metal, its thickness, the hole diameter, and how often you will cut. There is no universal winner.
A Hole Saw For Metal should have teeth suited to the material and a shank compatible with your drill or arbor. Bi-metal models can serve general workshop tasks, while carbide-tipped designs may suit tougher metals or repeated cuts. Check the manufacturer’s stated applications rather than relying on appearance alone. Tooth count matters, but it is not the whole story. Even careful buyers can focus too much on specifications and overlook fit, stability, or cutting conditions.
Small details matter. Secure the workpiece, use a suitable cutting lubricant when recommended, and follow the saw maker’s speed guidance. Excessive heat can dull teeth and discolor the cut edge. Let the tool cut without forcing it. Keep protective eyewear on, and clear metal chips safely; they can be sharp. A pilot bit helps guide many cuts, but it must be firmly seated. Not every setup is perfect. If the saw chatters, binds, or produces heavy heat, stop and reassess the material, speed, and support. The best option is the one that cuts cleanly and safely in your actual working conditions.
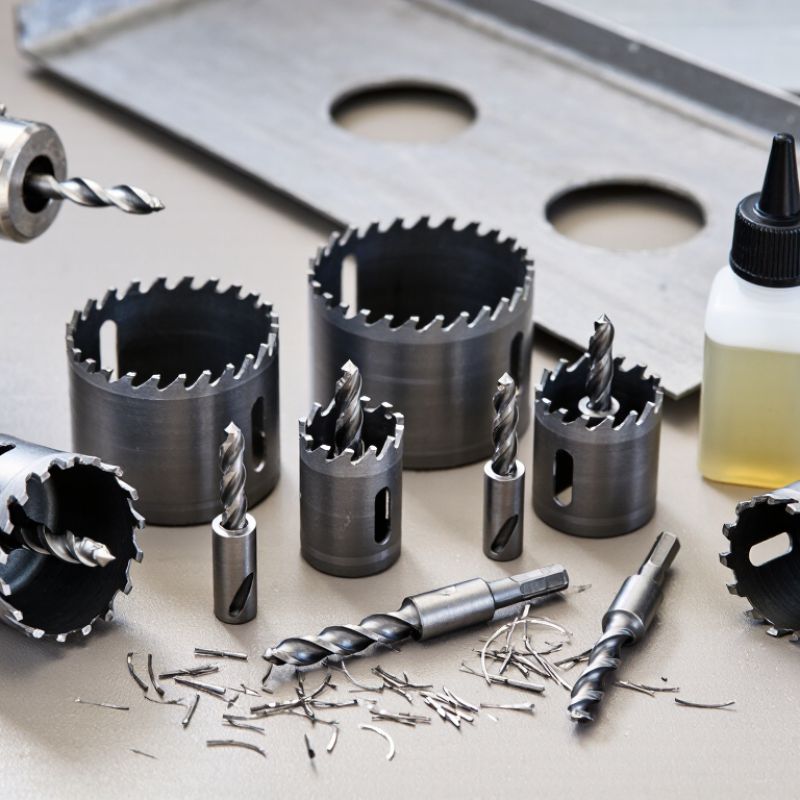
Table of Contents [Hide]
What a Hole Saw for Metal Is and How It Works
A hole saw for metal is a hollow, cylindrical cutter with teeth around its rim. Unlike a twist drill, it removes a ring of material and leaves a round metal core, called a slug. The cutter attaches to an arbor, which connects it to a drill. Many arbors include a small pilot bit. That bit helps guide the saw and reduce wandering as the teeth meet the surface.
The drill turns the saw while steady pressure brings its teeth into the metal. Cutting only around the edge takes less effort than boring a full circle, but the tool still needs careful control. Secure the workpiece, choose a cutter suited to the metal and its thickness, and follow the cutter maker’s speed guidance. Too much speed can overheat the teeth; too much pressure can bind the saw. Use suitable cutting lubricant when required, and clear chips safely. The slug may be hot. Let the tool cool before handling it. A clean hole is not guaranteed, either. Thin sheet can flex, and a pilot bit may mark the material beneath it. Checking the setup before cutting can prevent a small hole from becoming a rough one.

© Copyright - Pro Tool & Supply - Site by SVM E-Marketing Solutions - Sitemap
- Privacy policy