- Products
- Air Compressors & Air Tools
- Climate Control
- Compaction Equipment
- Concrete Cutting Tools & Equipment
- Concrete and Masonry
- Demolition & Excavation
- Electrical & Mechanical
- Fasteners and Anchoring Adhesives
- Floor Protection
- Generators and Welders
- Hand Tools
- Heaters
- Janitorial and Office Supplies
- Jobsite Protection
- Ladders & Storage
- Lighting & Lighting Accessories
- Man Lifts
- Material Handling Equipment
- Power Tools
- Pressure Washers & Pumps
- Safety Gear
- Safety Products
- Saws
- Surface Preparation
- SEASONAL PRODUCTS
- Rentals
- Air Compressor and Air Tool Rentals
- Climate Control Rental
- Compaction Rentals
- Concrete Equipment Rentals
- Demolition & Excavation Equipment Rentals
- Concrete Floor Grinder Rentals
- General Construction Equipment Rentals
- Generator Rentals and Welder Rentals
- Heater Rentals
- Light Tower Rentals
- Man Lift Rentals in Massachusetts and Rhode Island
- Material Handling Equipment Rentals
- Pressure Washer & Pump Rentals
- Saw Rentals in New England
- SEASONAL PRODUCTS
- Products
- Air Compressors & Air Tools
- Climate Control
- Compaction Equipment
- Concrete Cutting Tools & Equipment
- Demolition & Excavation
- Electrical & Mechanical
- Floor Protection
- Generators and Welders
- Construction Heaters
- Construction Ladders, Staging, & Storage
- Construction Lighting
- Man Lifts
- Material Handling Equipment
- Industrial Janitorial and Office Supplies
- Pressure Washers & Pumps
- Construction Safety Products
- Construction Safety Gear
- Surface Preparation
- Building Protection
- Diesel Accessories
- Zero Emissions
- Rentals
- Air Compressor and Air Tool Rentals
- Climate Control Rental
- Compaction Rentals
- Concrete Equipment Rental
- Demolition & Excavation Equipment Rental
- General Construction Equipment Rental
- Generator Rentals and Welder Rentals
- Construction Heaters Rental
- Light Tower Rentals
- Man Lift Rentals
- Material Handling Equipment Rental
- Pressure Washer & Pump Rentals
- Saw Rentals in New England
- Concrete Floor Grinder Rentals
- Zero Emissions Rentals
- Repairs & Used
- Parts
- Blog
- Services
- Resources
- About Us
- Contact Us
Sales & Rental of Construction | Industrial Equipment & Supplies


10 Best Trench Gratings for Drainage Projects
Choosing the right Trench Gratings can shape how safely and reliably a drainage project performs. A busy loading bay has different demands from a garden path. One may face forklift wheels, oil, and frequent washdowns. The other may need only to move rainwater without spoiling the landscape. Small details matter.
This guide to the 10 best trench gratings for drainage projects compares practical options by material, load suitability, opening design, and maintenance needs. Galvanized steel can suit many general applications, while stainless steel may be worth considering where corrosion is a concern. Ductile iron is often selected for heavier traffic, but the right choice still depends on the system and site conditions. Check the manufacturer’s load classification and installation guidance rather than judging strength by appearance alone. A narrow slot may look neat. It can also collect leaves or sediment, so cleaning access deserves attention.
There is no universal winner. Project budgets, local rainfall, vehicle movement, and exposure to chemicals all affect the decision. Even a well-rated grate can disappoint if it does not fit the channel correctly or is installed poorly. That part is easy to overlook. The comparisons ahead highlight useful strengths and trade-offs, while recognizing that product specifications vary by manufacturer. Treat them as a starting point, then confirm dimensions, materials, and rated performance for your exact application.
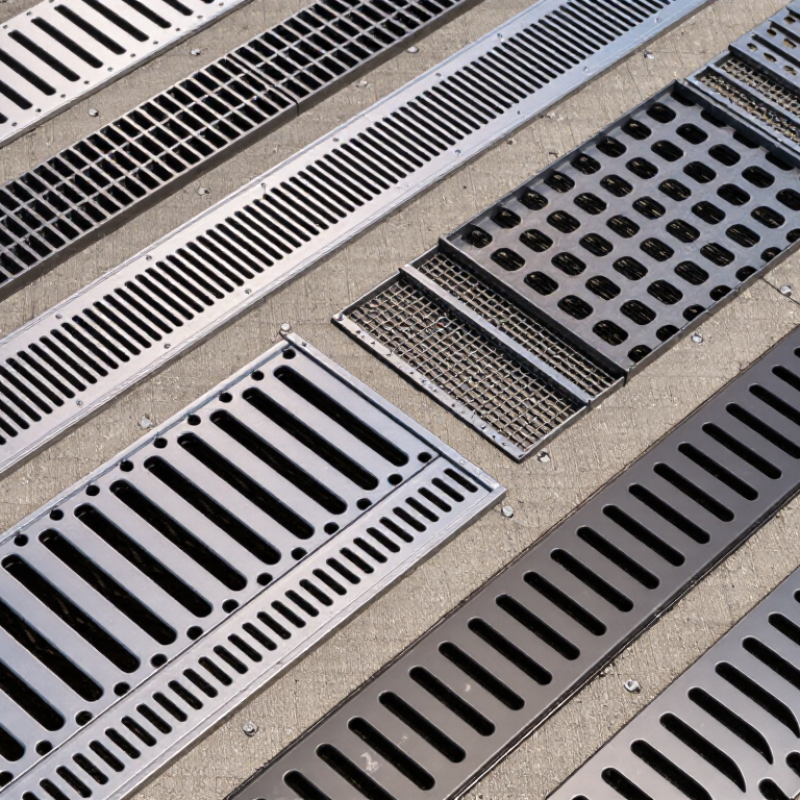
Table of Contents [Hide]
How Trench Gratings Work in Drainage Systems
A trench grate is the visible entry point to a drainage system. Water flows across the pavement, passes through the grate openings, then enters a channel that carries it toward an outlet or storage structure. The Federal Highway Administration’s Urban Drainage Design Manual, HEC-22, explains that inlet performance depends on flow rate, pavement slope, grate geometry, and approach conditions. In practice, a long grate does not guarantee good capture if water reaches it too quickly or debris blocks its openings. Leaves, grit, and plastic can collect along the upstream edge. Small details matter.
Designers use rainfall intensity and the area draining toward the trench to estimate the incoming flow. HEC-22 provides methods for evaluating inlet interception and bypass flow, helping engineers check whether water may continue past the grate. A useful review considers the whole route: surface slope, channel capacity, outlet size, and downstream connection. Grate openings also need to balance water entry with pedestrian safety and maintenance access. Real sites are less tidy than drawings. Sediment builds up, and installation levels can vary slightly. That is worth checking. Routine inspection helps reveal blocked slots, standing water, or loose sections before they reduce drainage performance.

© Copyright - Pro Tool & Supply - Site by SVM E-Marketing Solutions - Sitemap
- Privacy policy